2K显示器在Mac上显示的问题
2K显示器分辨率不低,够日常使用。但是,2K显示器接到 MacBook 上后字体显示的很小,换成 1080P 分辨率显示效果又特别模糊。不过只要强行给 MacBook 开启 HiDPI 后,就能解决这一问题。
什么是 HiDPI ?
它使用横纵 2 个物理像素也就是 4 个物理像素来显示 1 个像素区域,结果就是图像的细节得到翻倍、更清晰、边缘更平滑。
拿 13 寸的 MacBook Pro 举例,它的屏幕物理分辨率是 2560 x 1600,所以原生的 HiDPI 分辨率就是 1280x800。更高的一档 1440x900 HiDPI 缩放分辨率,则是虚拟出一个 2880x1800 的分辨率,再进行软缩放输入。所以你能发现苹果的电脑总是有很高的分辨率。
简单来说,HiDPI让分辨率更高的显示器上能够渲染和传统屏幕看起来大小相同、却更加清晰的图象。
开启 HiDPI 的方法
开启 HiDPI 的方法有很多,这里我使用的是 BetterDisplay ,简单操作,安装后直接就可以修改了。
真正通过修改配置的方式打开原生的HiDPI ,一旦通过该app开启之后,不再 需要依赖任何软件,直接体验原生高分辨率支持!!!
该功能是免费功能,不需购买pro,感谢开发者的巨大贡献! (引用:解决2K 显示器的尴尬!为MacBook 开启HiDPI(新方法支持M1)-zz的秘密基地 (zzbloc.top))
安装方法:
- 从 BetterDisplay 中下载最新版本,手动安装;
- Homebrew 安装
brew install --cask betterdisplay
2K显示器开启 HiDPI 后,全屏显示方法
Fully scalable HiDPI desktop · waydabber/BetterDisplay Wiki (github.com)
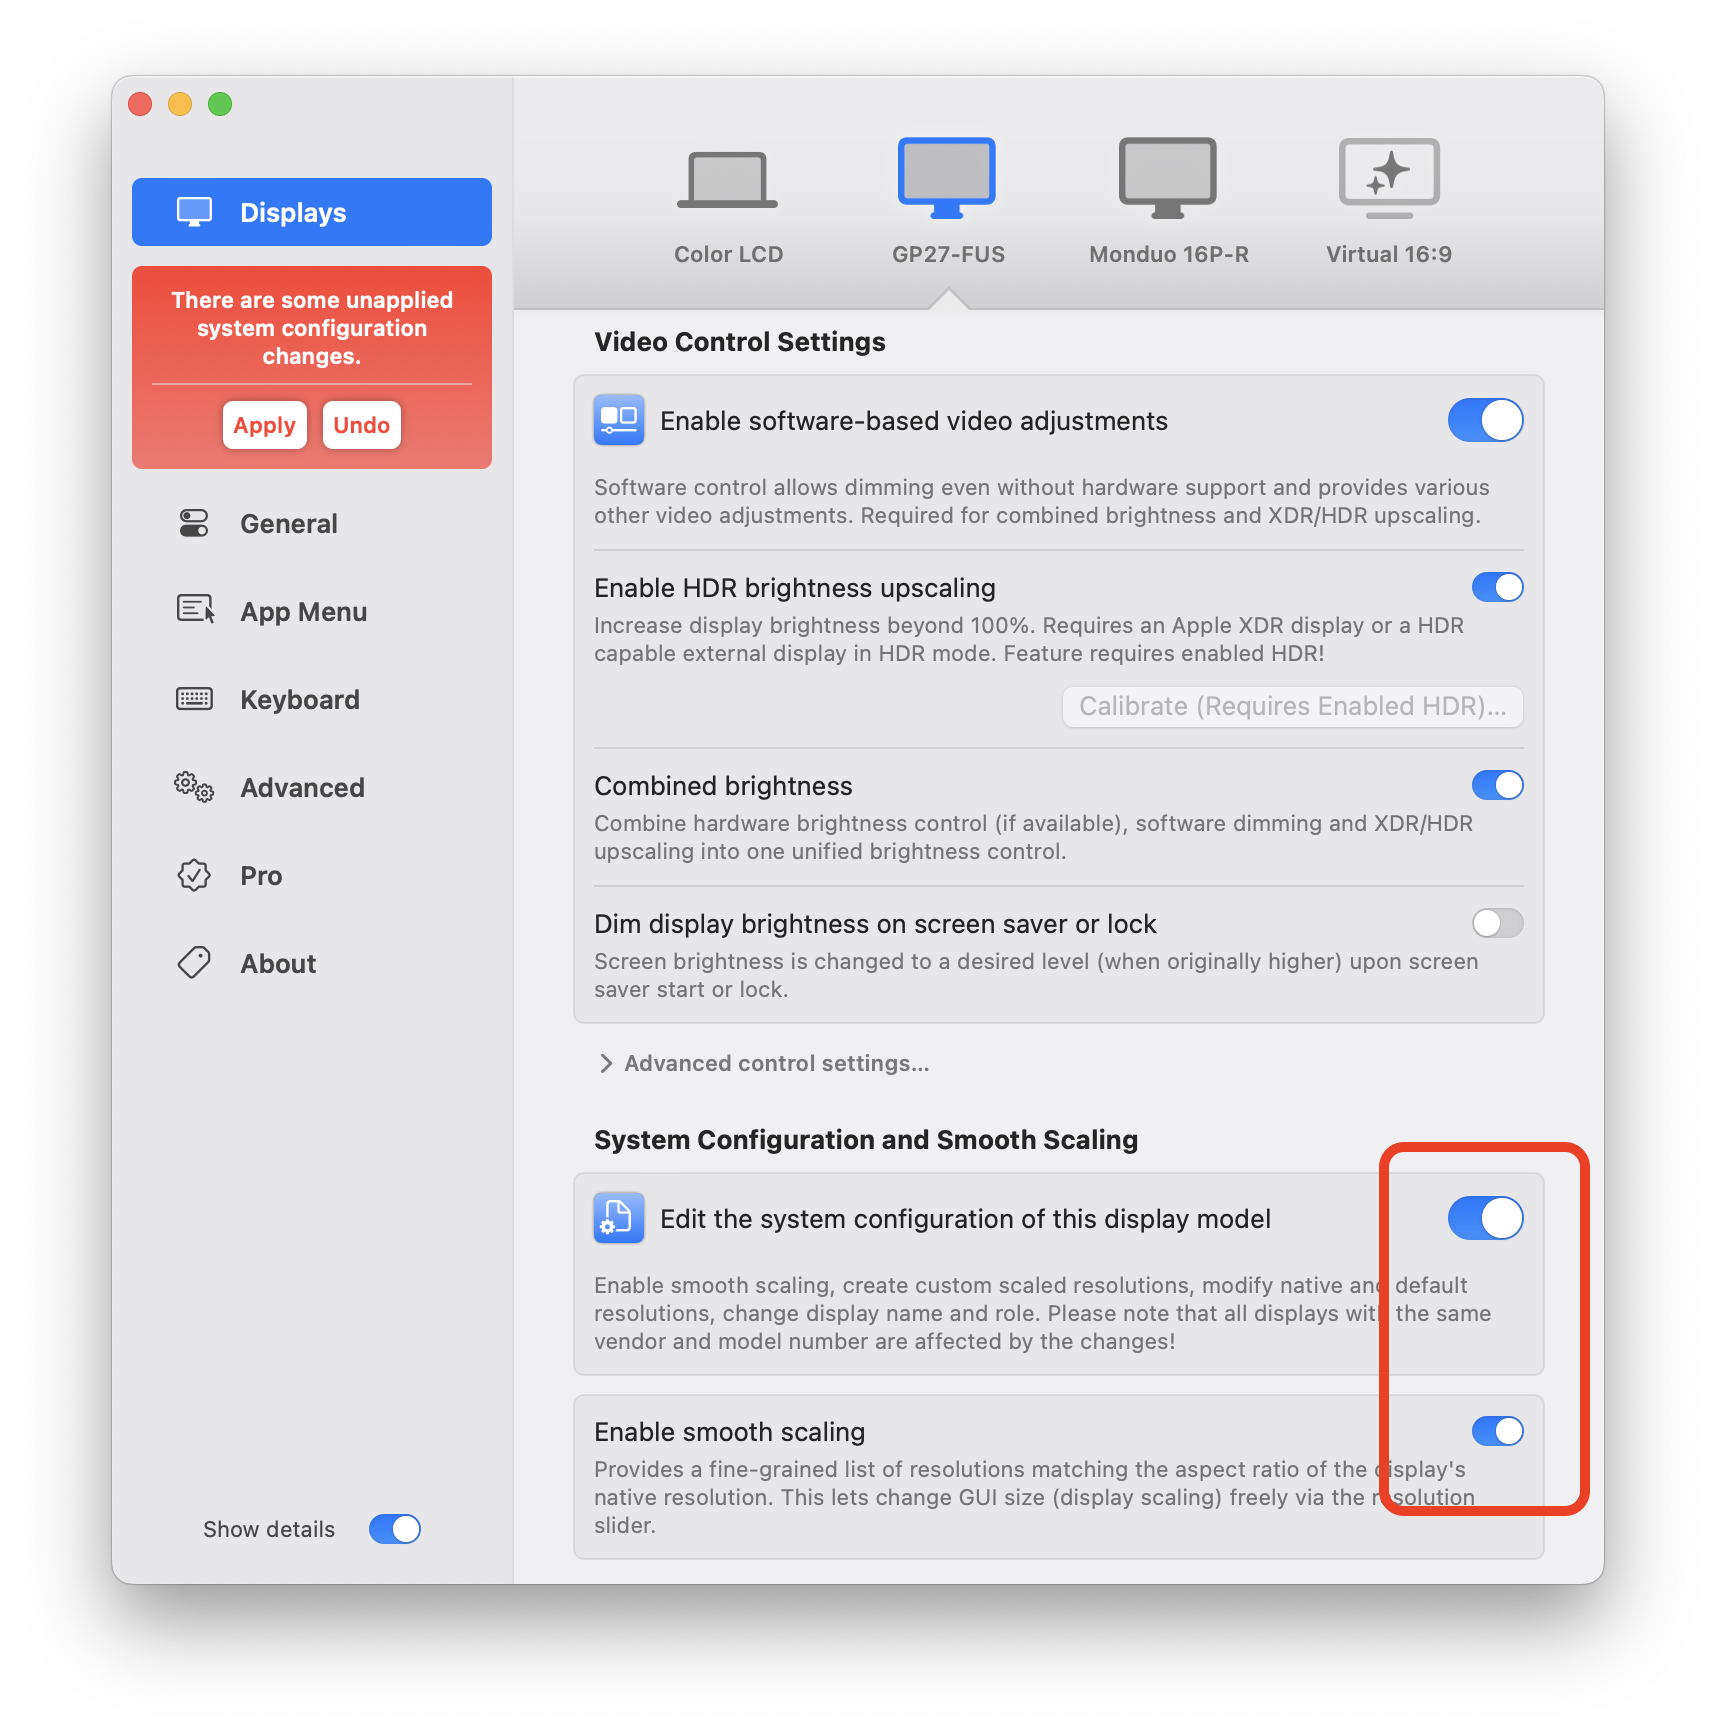
To enable the flexible scaling feature:
- Start the app and open the app menu (locate the BetterDisplay icon in the menu bar).
- Open
Settings(the gear icon at the bottom of the menu). - Navigate to the
Displayssection and select the desired display, - Enable the
Edit the default system configuration of this display modelfeature under the display you want to make scalable, - Enable the
Enable flexible scalingoption just below it as it appears. - If you did this for all the relevant displays, click on the
Applybutton in the red area that appears when the changes are made. - Enter your administrator level credentials and then reboot.
- After reboot, use the resolution sliders in the app menu to scale the desktop.
参考